The Basics
To help you get started quickly, we'll cover a few fundamental concepts of our platform.
Understanding these is crucial on how everything fits and functions together. Take a moment to watch the video for an overview of the platform and how it can support your business needs effectively.
In Summary:
Dashboard:
When you first log in, the main dashboard will be shown. There are two panels that make up the dashboard view. These are the widget panel and statistics panel.
-
The widget panel provides useful information about your widget name, domain url's and contact channels associated with your widget. When first starting out, there will be a default widget for you to configure.
-
The Statistics panel provides a summary of the number of Live chat threads initiated on a daily basis over a monthly period. It also presents the number of contacts made via the standard email, callback and offline contact forms presented as channels in your widget.
The dashboard provides an excellent overview of all the widgets you've created, along with detailed analytics for both chat and form submissions.
Workspace:
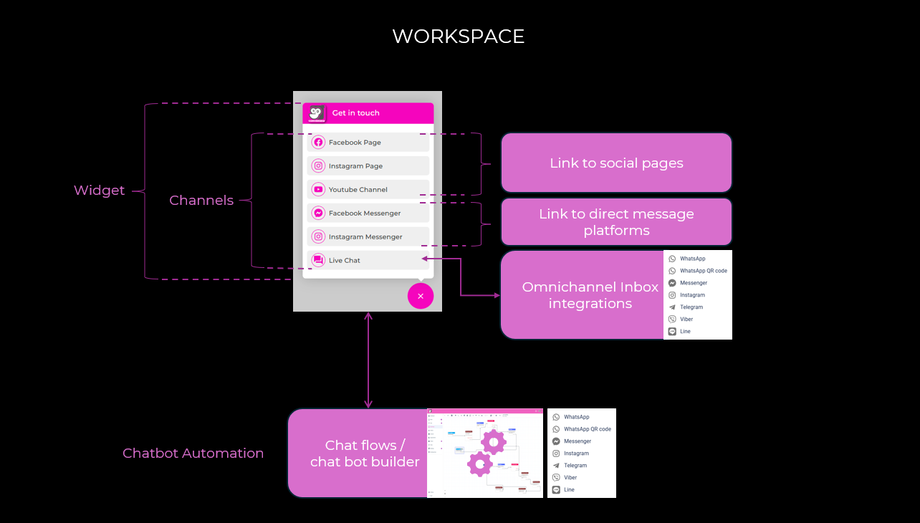
After setting up, configuring and customizing your widgets the respective contact channels and chat flows, the workspace is where you would typically spend most of your time engaging and supporting your customers.
Settings:
Clicking on the settings button will open up a second side panel.
There are 4 sections in the Settings side panel. These are "Workspace Settings". "Widget Settings", "My Team" and "Notification Settings".
-
Workspace Settings: The workspace serves as the primary container for various assets such as widgets, conversations, contacts, CRM items, and more. Multiple workspaces can be created and the typical use case for more than one workspace is if you were a digital agency and had multiple websites you are managing for clients. This ensures a neat way to keep all your clients and there data separated and organized.
-
Widget Settings: Widget Settings are where would configure and customise all the elements of the widgets look and feel and branding to align with your business needs. This is also where we set up each of the required contact channels that would be made available in the respective widgets for your customers to interact with you and your business.
-
My Team: Adding and setting up your team members which are referred to as Agents and assigning them to any relevant departments your business may have is done within the "My Team" section. Agents permission to widgets and integrations is also configured here.
-
Notification Settings: Within notifications you have the ability to configure sending notifications through various means when either a new thread or message chat has started. This ensures you are alerted every time a customer interacts with one of your message channels and either you or one of your agents, if available can engage with your customer.


